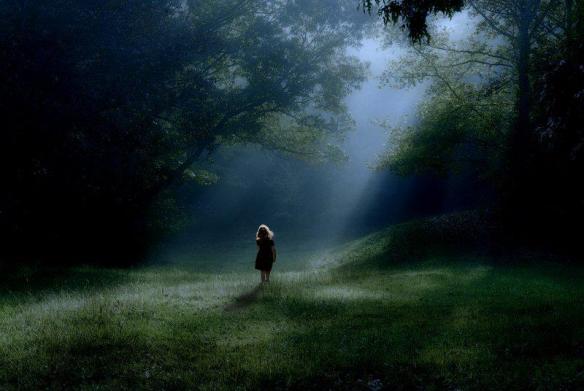
Firstly Vanessa and I would like to thank all of you who have followed our art challenge and commented here and on Facebook. We have really loved this process and although we had moments of stress and panic it has been exceptionally rewarding working together and sharing with you.
I finished my last strokes on my painting at 7.33 this evening and as I type this up, Vanessa is in a final flurry of paint and brushes. By the time I finish this post she will have emailed me her picture. I think with hindsight we should have made our cut-off during daylight hours when it is easier to photograph wet paintings. My apologies for the glare on the pictures. Once they are drier we will do a follow-up post so that you can see them in a better light.
So without any further ado here is the reference picture that we used to paint from

and the reveal…….
Painting 1 by Vanessa

and Painting 2 by Jackie

Congratulations to all of you who guessed correctly – most of you were right.
A little about our process:
Vanessa
- Adjust the reference photo to fit my canvas, and minimally adjust tones highlights and layouts on my pc. (If I am doing a real life study then I adjust the still life to be correct)
- Print a couple of reference pics
- Grid the reference picture on my print out. I do this when working from a reference photo, especially when it’s a bigger painting in order to get proportions correct.
- Tone my canvas in acrylic (I don’t like to paint directly onto white). I tone according to the reference. Either warm (Burnt Sienna) or cool (Payne’s grey).
- Draw a layout to the canvas, either using a grid or straight from observation. This can be rough or detailed depending on the complexity of the subject matter.
- Paint in the tonal values using either warm or cool palette (I do this in acrylics as it saves on drying time)
- Start adding the first layer of basic colours to all areas. I paint in oil using Winsor & Newton Artisan water mixable oils, starting with darker values working to lighter areas
- If I have time I usually oil out the painting after each layer, this helps with building depth. In the painting challenge I never had the time to wait for this to dry so I omitted this step
- I then build up on each layer with more colour, adding depth with glazes and adjusting tones. Each layer gets heavier, painting fat over lean. Trying not to lose track of the density of the paint is quite a challenge.
- I leave the focal point (little girl) until close to last, along with the details and any deeper tones that need adjusting. I like to introduce and work on these at the end to tie in the painting
- The very last thing I did was work on the white light and intense highlights
- Wait 6 months for painting to dry and varnish. During this time it’s good to re-evaluate the painting or add/change any areas.
- Shew 7 days to do all that…not even close. Dave is spot-on, we are never quite done!
- (Total painting time 24 hours.)
Jackie
Firstly I must say that I have never really investigated my process, and I think that it is quite different each time depending on the picture I paint. I have learned so much about planning and process while working with Vanessa on this project.
1. I avoid drawing as much as possible and if I do it is normally just a basic outline to get placement. With this picture I did not feel the need to draw first.
2. I start directly using the colours I see on the picture, often mixing my paint tones directly on the canvas. I always do this using acrylics
3. I just keep on going like this leaving the focal point and the highlights till last.
4. On this painting I did my final coat in oils to get a smoother, brighter finish. This way I don’t have to wait too much for the painting to dry as acrylics dry really fast.
5. I like to live with a painting for a few months after I finish it and can sometimes fix it up, up to a year later.
5. My total painting time on this picture was 6 and a half hours. – 5 in acrylic and 1 and a half in oil.
Discussion is now open in the comments section of this post – please ask as many questions as you like and Vanessa and I will try to answer you.
-24.367850
30.756236


