Arty update

While I may not have been blogging much, I have continued to paint.  Here are a few of my recent works.

These wet pebbles were for our “Going Coastal” assignment on Free your Art.

and an enamel bowl and jug – this was an exercise on white on white – I really enjoyed it.

I also painted two wall murals at two under-privileged schools for a charity which does really great work with the schools on raising awareness of our ecology and ecosystems and also running food gardens at the schools

Free Your Art – Challenge 3

Click on the picture below to join our Facebook page to participate in this challenge.  It runs from 6 July to the 6th of August 2012.

(written by Vanessa Marais)

The Artful Cartoon

Our third online assignment will test your creativity in your chosen medium and encourage you to think outside the box

Gavin Marais won the vote in the Tree Challenge and he has chosen the next topic to be ‘Simple Toons to works of Art’.

He had this to say,” Sounds silly as a topic, but it could be anything from disney to cartoon network, print-based cartoon or comic book characters to a block buster 3d animated movie character. In essence, I’d like people to have fun interpreting a typically ‘childlike’ genre into an artwork worthy of any wall.”

Choose any cartoon character you like, but make it your own. Who’d expect to see Garfield in Charcoal, the Simpson’s in Pastels, or Goofy in Oils? Bake a cake, embroider, make a mosaic, form a sculpture. Go mad and have FUN!


Guidelines

  • ·         Cartoons are the theme.
  • ·         They must be a personal expression in your style and chosen medium
  • ·         Reference material is to be sourced individually
  • ·         Medium: Open
  • ·         Size: Open

Timeline:  

  • The assignment runs from 6th July to the 6th Aug 2012.
  • Final photographs must be uploaded to the appropriate album by 6pm GMT 6th Aug 2012.
  • There will be no time extensions, so don’t procrastinate 🙂
  • Please upload progress and reference pictures to the appropriate  albums. We want to hear from you and see who is taking part. So keep in touch

This challenge may sound confusing to you as it did to me at first so Vanessa has put together some examples so that you can see what we are looking for

We are looking for as many participants as possible. Beginners to  experienced artists are all welcome.  I hope you will join us for this challenge.

A lazy painting day

Sundays on the farm are my best days.  All the housework is done, and I get to do as I please.  I normally take it slow and fiddle in my veggie patch and take Cleo for long walks or I paint.  Today, I have been lucky enough to do all three.  Our weather is beautiful, with the temperatures around 26-28 deg C (not bad for mid winter).

On the painting front, I have been working on painting a collection of fruit and veg for my kitchen wall.  Today I was able to paint two more to complete the collection of four, but now I think I am going to keep going and paint a whole pile of them as it seems they will sell off rather fast judging from reactions I have had so far.

I was really not sure which to paint for this collection but I think my choices have worked reasonably well,

What do you do on your lazy days?

Our first group art challenge is launched – Free Your Art

Why the Egg?

Being the first online challenge, we thought that in order to see the various mediums and skill levels at play we would begin with something basic. Don’t be deceived however, as eggs can be rather tricky to get right. They can easily end up looking like potatoes. I am sure it will test your tonal skills, drawing skills and patience levels. Neither of us has ever painted a still life with eggs, so the task will be worthwhile. Starting with eggs will give an appreciation of form and tone (shadows-midtones-highlights), and how the two go hand in hand when creating the illusion of depth and dimension.

Guidelines

  • The reference image is provided. Feel free to adjust the image if need be.
  • Eggs are the “star” theme and if possible stay true to the general layout as far as possible. We are not looking for carbon copies, but rather expression in style and medium.
  • Any medium is acceptable, although some sort of colour and brush work would be ideal for this challenge. Art apps and digital art or photography are also welcome, but please start from scratch i.e. don’t trace or digitally copy.
  • Size guideline  A4/A3

Timeline:  The challenge runs from the 25th of April to the 20th of May 2012. Final paintings must be uploaded to the appropriate album on our Facebook page by 8pm SAST 20 May 2012 or emailed to me by 12h00.

Feel free to upload your progress pictures to the Facebook page whenever you wish. We would love to see how things are going.  If you get stuck, upload a picture to the page wall and ask your question. We are all here to learn and help.

Credits:

Thank you to Dale Tyndall for taking the photo, and to Vanessa Marais for choosing this challenge, photoshopping and for telling us why we should paint eggs.

Let’s get painting!

Click on the picture below to join our Facebook page

Art challenge – Final reveal

Firstly Vanessa and I would like to thank all of you who have followed our art challenge and commented here and on Facebook.  We have really loved this process and although we had moments of stress and panic it has been exceptionally rewarding working together and sharing with you.

I finished my last strokes on my painting at 7.33 this evening and as I type this up, Vanessa is in a final flurry of paint and brushes.  By the time I finish this post she will have emailed me her picture. I think with hindsight we should have made our cut-off during daylight hours when it is easier to photograph wet paintings. My apologies for the glare on the pictures.  Once they are drier we will do a follow-up post so that you can see them in a better light.

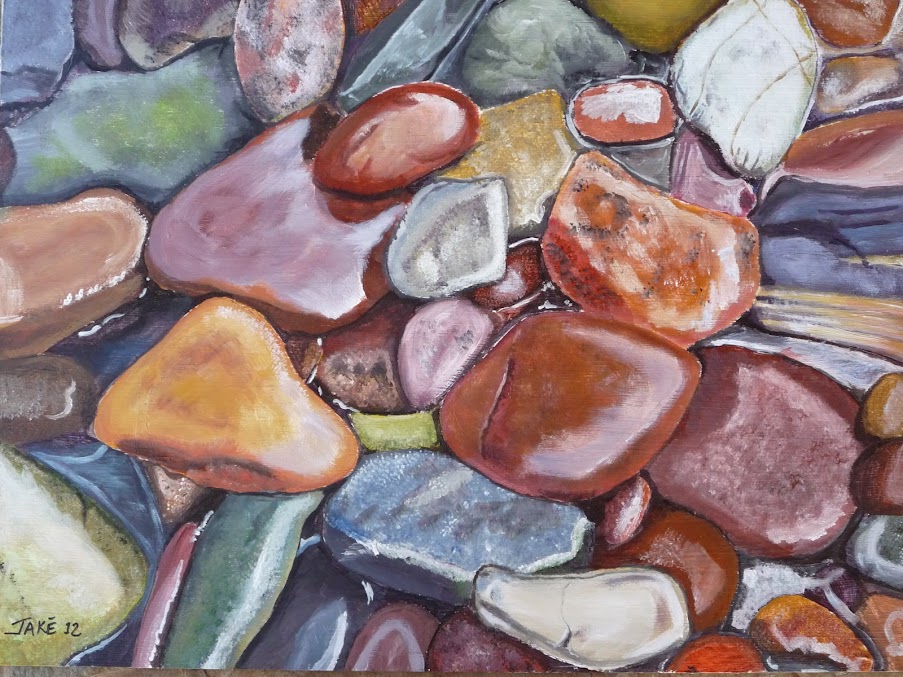
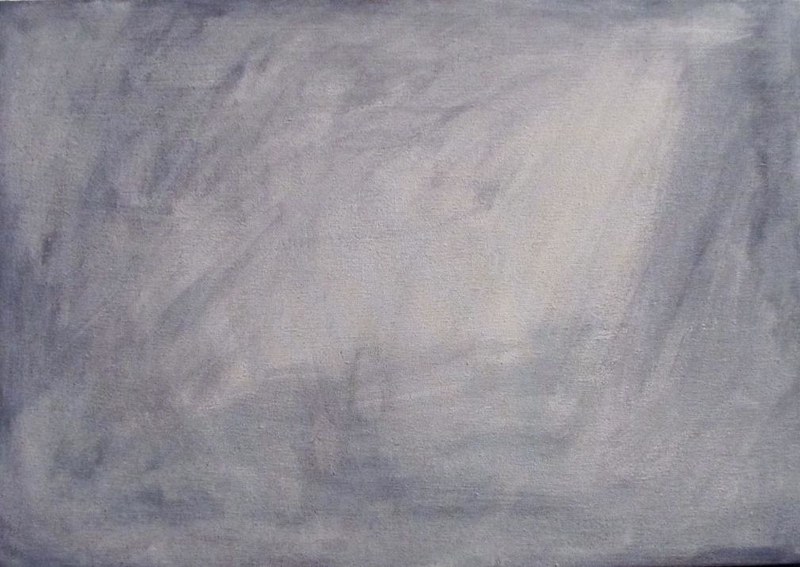
So without any further ado here is the reference picture that we used to paint from

and the reveal…….

Painting 1 by Vanessa

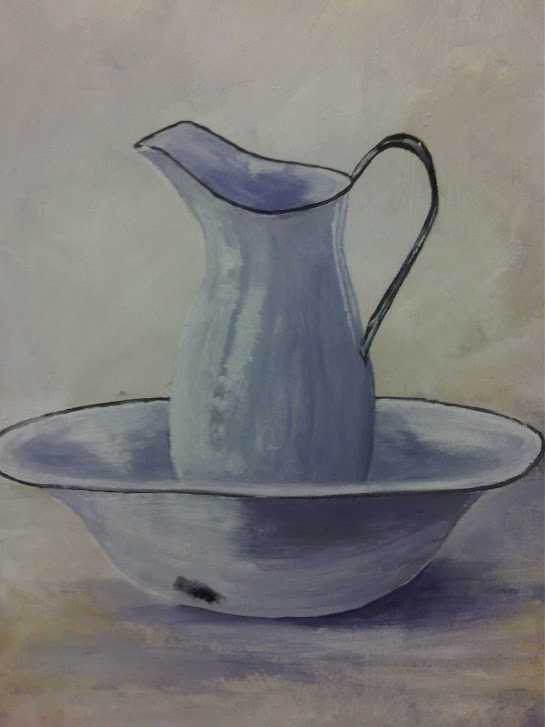
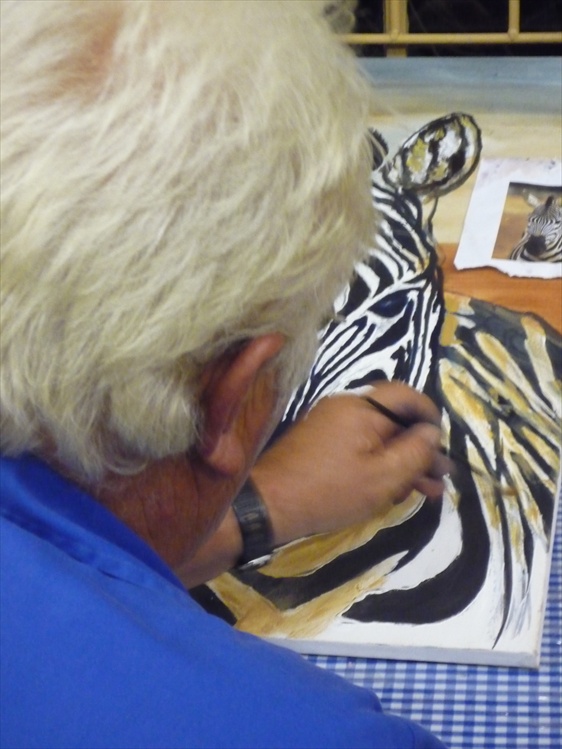
and Painting 2 by Jackie

Congratulations to all of you who guessed correctly – most of you were right.

A little about our process:

Vanessa

  1.  Adjust the reference photo to fit my canvas, and minimally adjust tones highlights and layouts on my pc. (If I am doing a real life study then I adjust the still life to be correct)
  2. Print a couple of reference pics
  3. Grid the reference picture on my print out. I do this when working from a reference photo, especially when it’s a bigger painting in order to get proportions correct.
  4. Tone my canvas in acrylic (I don’t like to paint directly onto white). I tone according to the reference. Either warm (Burnt Sienna) or cool (Payne’s grey).
  5. Draw a layout to the canvas, either using a grid or straight from observation. This can be rough or detailed depending on the complexity of the subject matter.
  6. Paint in the tonal values using either warm or cool palette (I do this in acrylics as it saves on drying time)
  7. Start adding the first layer of basic colours to all areas. I paint in oil using Winsor & Newton Artisan  water mixable oils, starting with darker values working to lighter areas
  8. If I have time I usually oil out the painting after each layer, this helps with building depth. In the painting challenge I never had the time to wait for this to dry so I omitted this step
  9. I then build up on each layer with more colour, adding depth with glazes and adjusting tones. Each layer gets heavier, painting fat over lean. Trying not to lose track of the density of the paint is quite a challenge.
  10.  I leave the focal point (little girl) until close to last, along with the details and any deeper tones that need adjusting. I like to introduce and work on these at the end to tie in the painting
  11. The very last thing I did was work on the white light and intense highlights
  12. Wait 6 months for painting to dry and varnish. During this time it’s good to re-evaluate the painting or add/change any areas.
  13. Shew 7 days to do all that…not even close. Dave is spot-on, we are never quite done!
  14. (Total painting time 24 hours.)

Jackie

Firstly I must say that I have never really investigated my process, and I think that it is quite different each time depending on the picture I paint.  I have learned so much about planning and process while working with Vanessa on this project.

1.  I avoid drawing as much as possible and if I do it is normally just a basic outline to get placement. With this picture I did not feel the need to draw first.

2. I start directly using the colours I see on the picture, often mixing my paint tones directly on the canvas.  I always do this using acrylics

3. I just keep on going like this leaving the focal point and the highlights till last.

4. On this painting I did my final coat in oils to get a smoother, brighter finish.  This way I don’t have to wait too much for the painting to dry as acrylics dry really fast.

5. I like to live with a painting for a few months after I finish it and can sometimes fix it up, up to a year later.

5. My total painting time on this picture was 6 and a half hours. – 5 in acrylic and 1 and a half in oil.

Discussion is now open in the comments section of this post – please ask as many questions as you like and Vanessa and I will try to answer you.

Art challenge – day 7

We are both now painting furiously with our deadline of Sunday 8pm looming over us.

I think the biggest hurdle in this challenge so far is getting the layers of paint dry before starting the next one. We are discussing our pictures with each other constantly but also only see each others paintings as these posts go up.

Our pictures today are taken of wet paint so please excuse any shine you see. Wet paintings are very hard to photograph without special equipment.

Don’t you think it’s amazing how they are starting to come together?

To follow the process see the posts listed below.

REFLECTIONS – Anne Watt

Anne Watt, who runs our art group, had the opening of her first solo art exhibition last night.  Her work is currently being exhibited at the Chalkhamhill Gallery in the Kamogelo Center in Hoedspruit.  Anne, we are so proud of you.

The work of this show is a reflection of Africa.

We had a superb evening, with most of her art students attending as well as a large crowd of local residents and even some Easter tourists.  One of Anne’s paintings in the gallery was painted directly onto the wall, and I believe the entire wall has been sold to a very willing buyer.  I took the following photos at the event however, my night time photography needs some serious work.  It really does not do Anne’s pictures justice.

Art challenge – day 3: Progress

If you have just stumbled across this post, please read about the challenge here, and about day 1 and 2 here.

Day 3 seems to have been much more productive and we have some interesting pictures to see.

By now you will have a good idea of what the paintings are of, using the colours from one artist and the structure from the other you can easily build the picture in your head.

We would love to hear your thoughts so far.

Art challenge – day 2

Well day one was a complete disaster with both artists procrastinating  – seems this is standard before starting a picture.  Dogs got washed and banking and budgets took preference and even getting a lawn cut came first.  A good way to get those disliked chores out of the way.

Guilt ridden and worried about time, both ladies got going quite early on their paintings on day 2.  Much discussion via Blackberry messenger took place and by the end of the day they should have had something to show for it.

Here are their results.

This artist drew her picture

and then promptly painted over it to rid herself of the white canvas

so now she has left it to dry and will start drawing all over again – tomorrow hopefully. Time is short.

Our other artist didn’t even bother to draw anything but just started with splodges of colour.

and gave up by midday.

Interesting to note the two different techniques and also that they have chosen different orientations (landscape vs portrait) to depict the same picture.

Lets hope they get themselves into gear and have something more to show soon!

Modelling clay

Art group on Thursday night was all about clay modelling.  I was caught up in my jackal painting so did not work with the clay which I regret a bit. Everyone was so absorbed with what they were doing and the results were very interesting.  Anne asked the group to use the human form but to distort it.  Here are some of the results.

that’s a bottom….

Nicola’s skinny man

Mark’s second piece

and his first one – lots of laughs with this one – I love the left mans hat

Dianne’s man with kissable lips

Johan’s foot and shoes

and Millie’s dainty lady.

I’m sure you also noticed all the glasses of wine.  We have quite a festive time at these classes.

And finally, here is Alf (who arranged my roofs and my shade cloth house) – working on his zebra.  This man is totally colour blind and paints beautifully.  We just have to tell him which tube of paint to use 🙂